Tips
If video is the best medium for your purposes, review these tips to create the best project you can. For more in-depth advice about video, equipment, editing software and studios, contact the Digital Media Studio.
What you need
- Camera: You can easily spend thousands of dollars for a video camera, but inexpensive camcorders, HDSLR cameras and smartphones are capable of recording video.
- Tripod: Essential for steady shots.
- Microphone: Your sound quality will improve with the use of an external microphone like a shotgun mic. Lavalier microphones are excellent for interviews.
Basic camera setup
- Most video is filmed horizontally—unless it is specifically for social media.
- Know your frame rate:
- TV broadcast safe is 30 fps.
- Cinematic is 24 fps. It looks smoother.
- Sports should be filmed at 60 fps. This format can also be used to create slow motion video in post production.
- 4K creates higher quality imagery but it will take up a lot of space on phones and computers.
- 1080p is set for high-definition video and works great for online videos.
Interview guidelines
- Use a tripod for interviews.
- Have the interviewee look at you when answering questions. Avoid having the interviewee look into the lens. Always compose your interview so the interviewee is facing the side of the shot that has the most empty space.
- Do not angle the interviewee too far into a profile.
- Do not interview people with their backs against a wall.
- Be mindful of busy backgrounds—you don't want something sticking out from behind the subject's head.
- Do not interview people in a noisy area.
- Interview one person at a time.
- Make sure you and the camera are at eye level with the interviewee.
- It's best to have the person sitting down.
- If using a lavalier microphone, make sure it's clipped six to 10 inches under the interviewee. If no microphone is available, make sure the camera is close enough.
- Don't conduct the interview in a windy location.
During the interview
- Ask the interviewee's name and spelling.
- Remind the interviewee to look at you and not the camera.
- Ask open-ended questions.
- Avoid verbal responses.
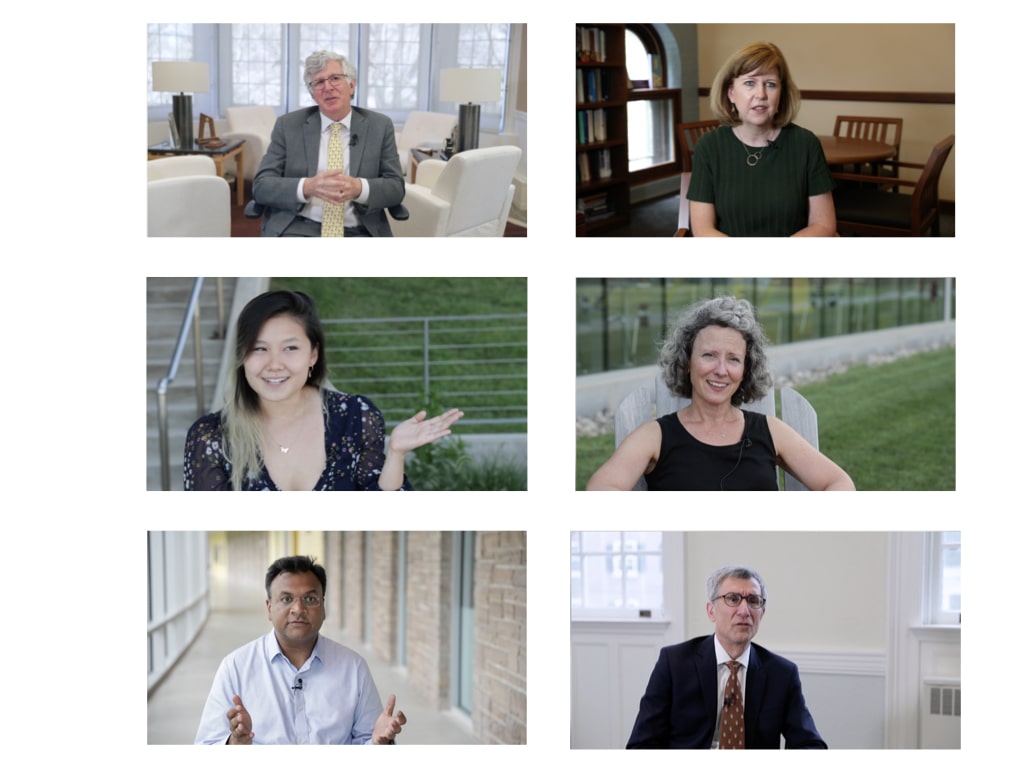
Interview setup examples

B-roll guidelines
- B-roll is the video footage you gather to edit with your interview.
- Gather footage that relates to the story.
- Use a tripod.
- Make sure you’re in focus.
- Avoid staying in the same camera position or sight line for too long. Shoot and move.
- Vary shot types (wide establishing shot, medium shot, tight detail shot), camera angles, focal lengths and compositions.
- For now, avoid stylized pans and zooms.
- Try to record five to 10 seconds of each shot.
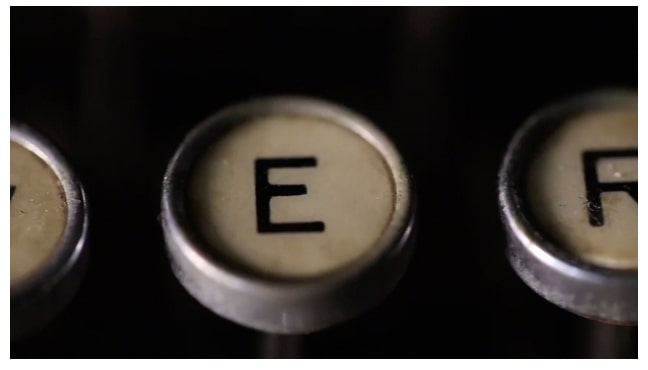
B-roll examples
- Long/wide shot: Shot from a distance or with a wide angle lens. It gives a sense of place.
- Establishing shot: The first shot/opening of a scene. It's usually a "wide establishing shot" but doesn't have to be.

- Medium/bust/mid/waist shot: A shot from a medium distance. A bust shot is a typical interview distance (a little below the shoulders and up).

- Tight/detail/closeup/extreme closeup shot: A shot that tightly frames a person or object. VERY close.

Editing
- Much of what will make your video compelling happens through the video and audio editing process. What software you choose will depend on your particular production. The options include:
- Free programs, such as Movie Maker (from Microsoft) or iMovie (from Apple)
- Professional programs, such as Final Cut Pro or Adobe Premiere
- The desired length of a video depends on its purpose. For web-based video, the accepted industry standard length is one to three minutes.
- Edit the interview first. Edit out your questions from the interview—use just the responses.
- Edit your B-roll over the interview.
- Make sure you show the interview shot at least once during the video and include the person’s name and title the first time.
- Avo— cuts—two sequential shots of the same subject or similar compositions.
- Don’t repeat shots.
- Make sure to use nat sound from the B-roll, but be sure it doesn’t compete with the interview levels.
- Lehigh University videos should close with a Lehigh-branded bumper that includes the Lehigh logo, a title, credits and copyright information. View Lehigh-branded video assets >
Lower thirds
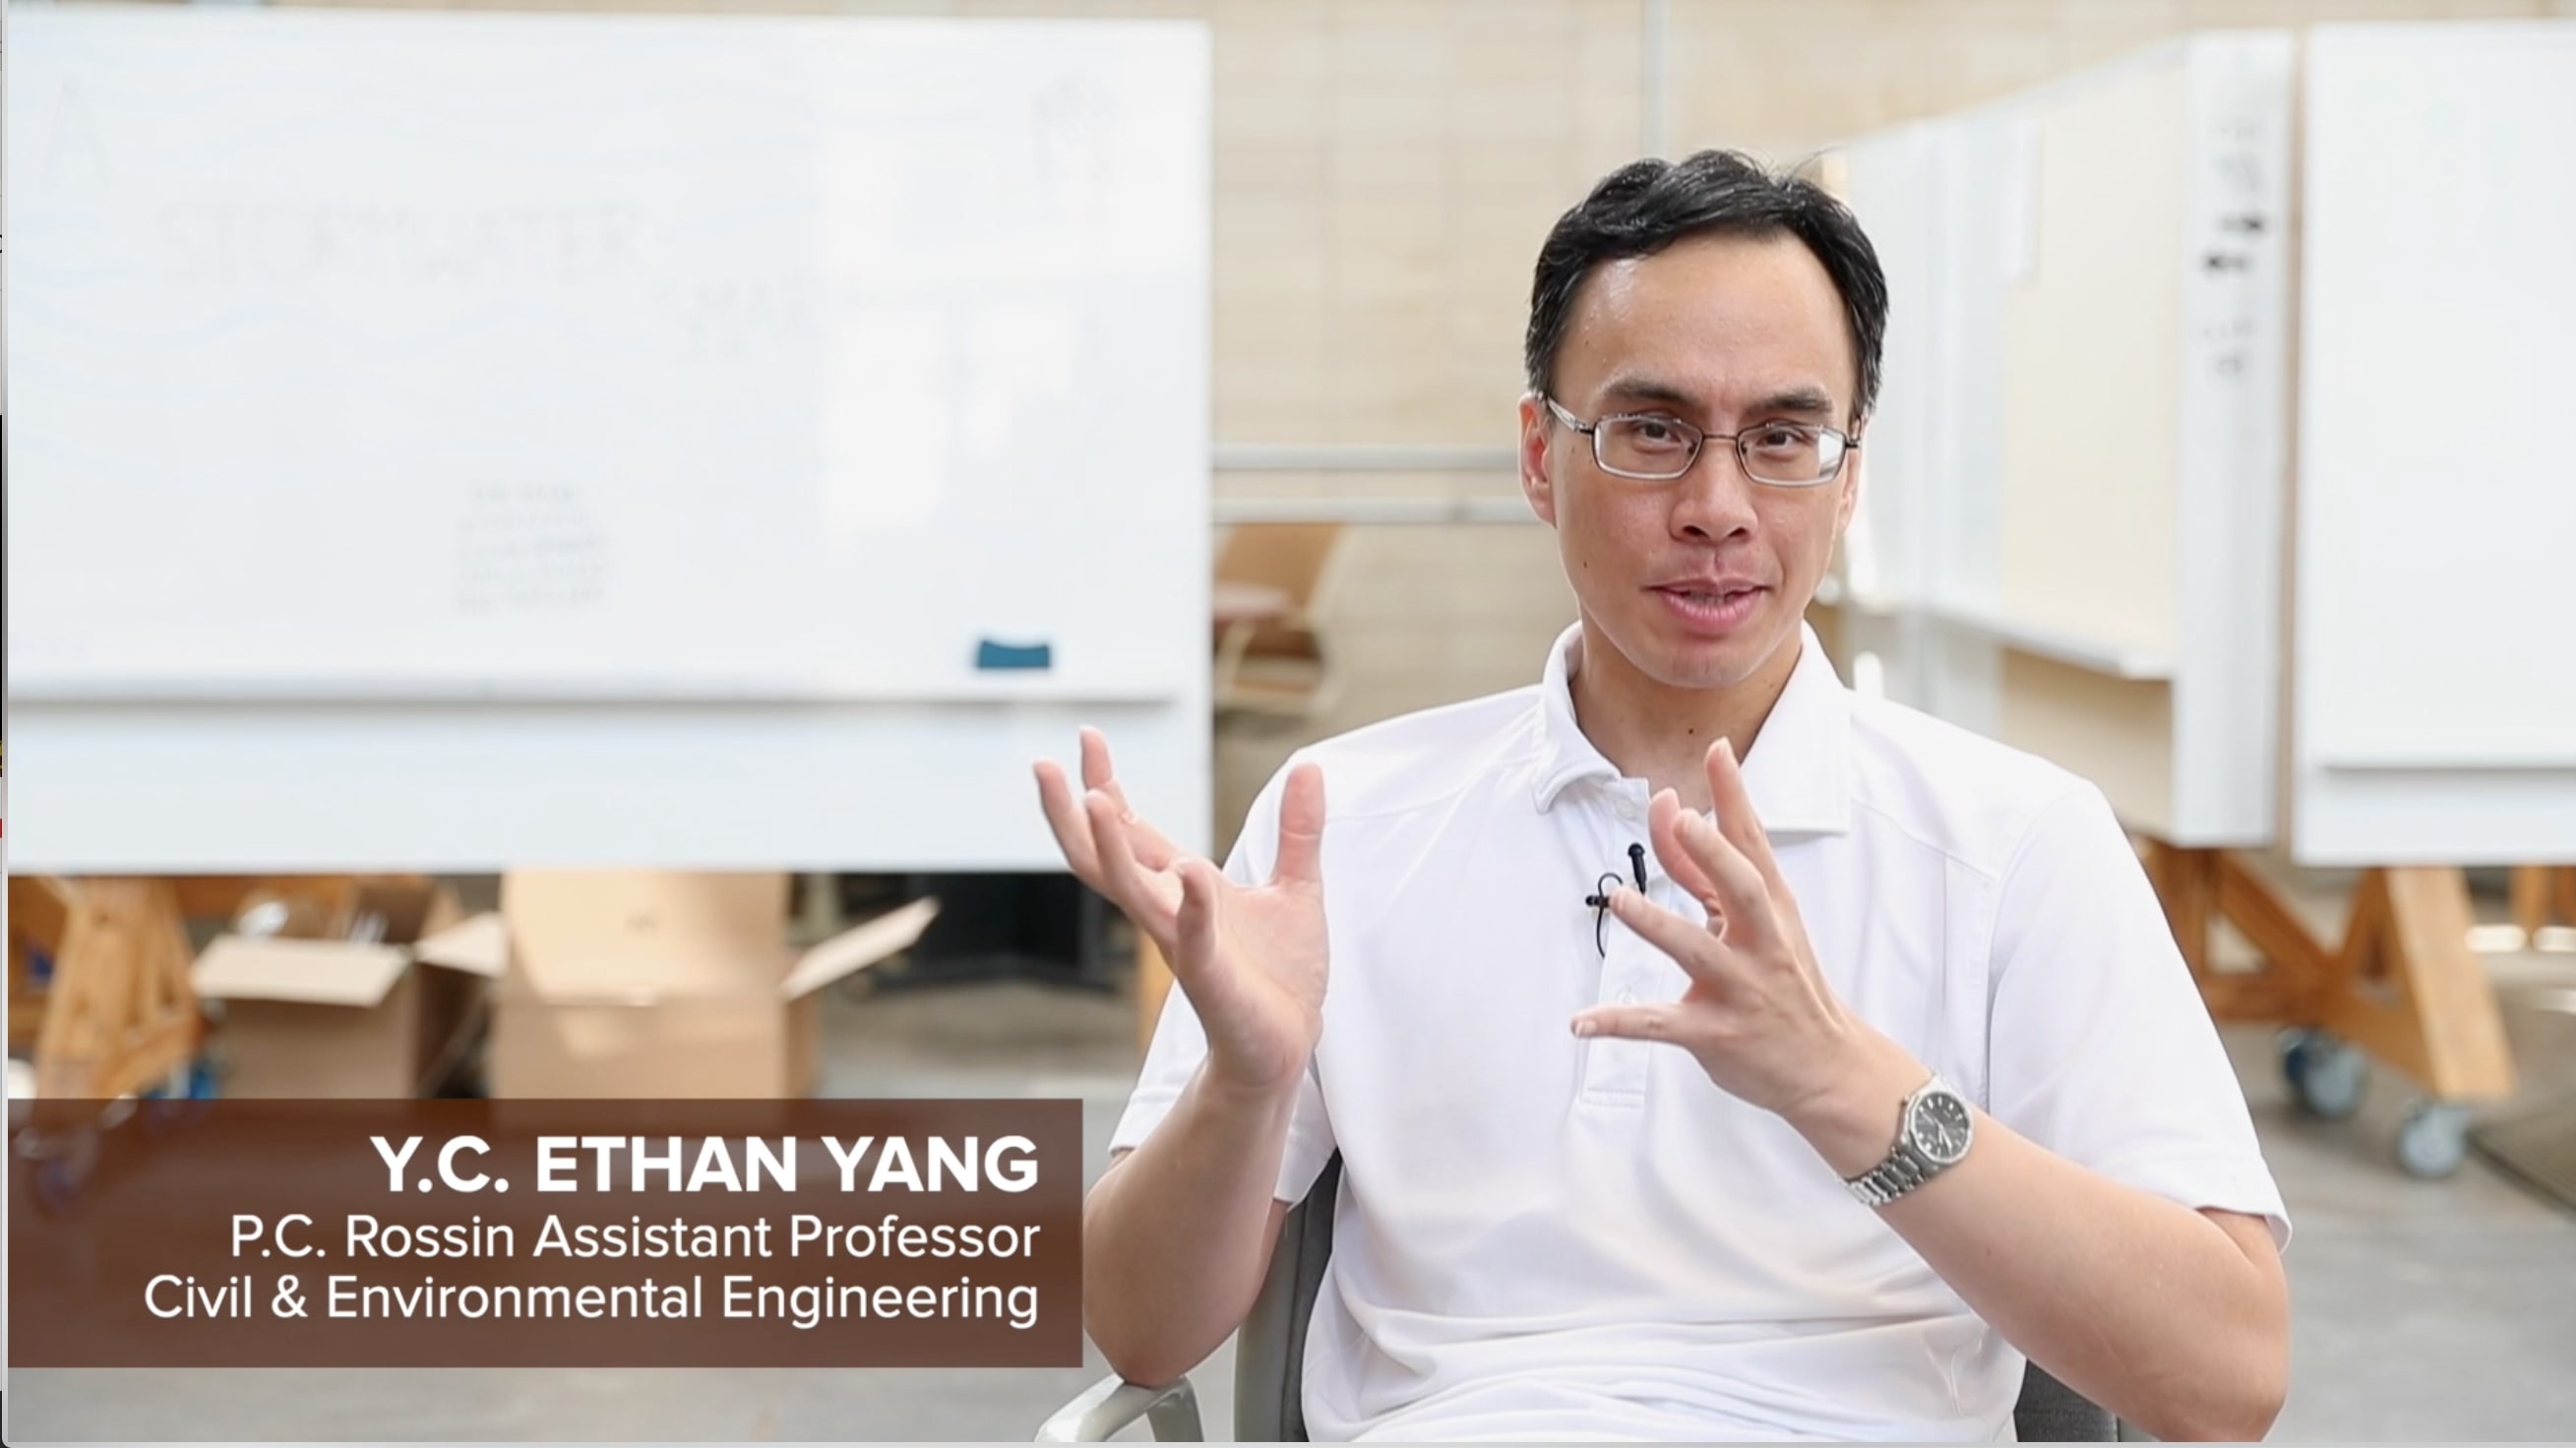
- A lower third is a text overlay that appears during the first appearance of an interview shot.
- A lower third should appear once for each person interviewed in the video.
- It should include the person’s name and title. Graduation year, major or college can be included if they pertain to the video story.
- It should be up for about five to 10 seconds– depending on the length of the information that needs to be read. Fonts and colors should align with Lehigh's design visual guidelines.
- Proxima Nova for sans serif fonts and Chronicle for serif fonts.
- Make sure the information is easily readable so that the text doesn’t get lost in the background.
Lower third example

Accessibility
- If you plan to post your video online, be sure to provide captions and a transcript to make your video more accessible to all viewers. There are both free and paid services available for creating caption and transcript files for your videos.
- Transcript/caption resources:
Publishing and Sharing
- If you plan to post the video on a website or in social media, you can first upload the video to YouTube or another video-sharing site and then use the embed code to embed it in your site.
- If your video appeals to a broad Lehigh audience, share it with University Communications to be published on Lehigh's official YouTube channel.
Filming at Lehigh
Photography or videotaping that is carried out by the university or an educational or nonprofit entity and is intended for educational or public affairs use will be permitted (subject to logistical and security concerns detailed below). Use of photography or videotape for advertising of commercial products or services is prohibited.
Generally, permission to photograph or videotape will be limited to pictures of the exterior of buildings or facilities. In the exceptional case where videotaping or photography of interior property is permitted (for example, a video or still photographs being produced by Lehigh for its own use or in the unusual case of a public panel discussion to be videotaped for later broadcast), a number of special circumstances in addition to the general ones of disruption, etc., listed above need to be considered, including:
- Have all the participants (including students or audience members) been notified of and given permission to the videotaping?
- Are alternative seats available for any audience member who does not wish to be videotaped?
- Have copyright permissions been granted from all potential copyright holders?
In reviewing requests, the following will be considered: whether the purpose of the photography or videotaping furthers the university's educational mission; the level of potential disruption to students, staff and faculty; the expense, inconvenience and/or potential damage to property of the university; and the potential for misrepresentation or misunderstanding of university association with the project. The names and trademarks of Lehigh University or any of its units may not be used in promoting a video or other project without specific advance permission of Communications and Public Affairs, even when permission to photograph or videotape has been given.
Video Assets
To increase the quality and brand alignment of all videos produced by Lehigh University, Communications and Public Affairs has put together some branded assets for our collective use. The video asset package, created for Final Cut Pro X, includes the following items:
- Intro and end slides
- Lower thirds
- Tutorial (written instructions and video demonstrations)
*Lehigh login required.
If you are not using FCPX or have questions about these assets, please contact Stephanie Veto by email, smv214@lehigh.edu, or by phone, 610-758-4314.

